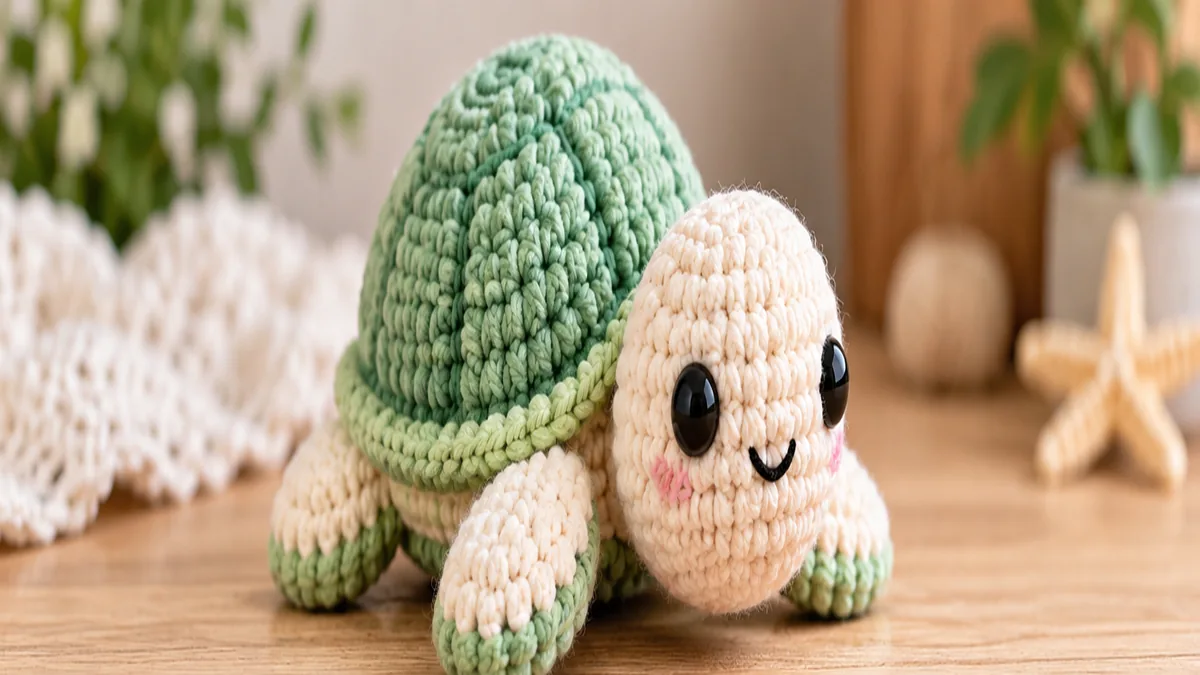
This no sew turtle crochet pattern creates a small, rounded amigurumi turtle with a textured shell, four built-in flippers, a tiny tail, and a soft head shape. The shell is made in two crochet pieces that are joined together with your hook, so you do not sew the pieces together with a yarn needle. The result is a compact beginner-friendly turtle that works well as a desk plush, small handmade gift, market-style mini toy, or starting point for a keychain version.
The pattern uses US crochet terms and is best for an advanced beginner who is comfortable with a magic ring, single crochet, increase, decrease, working in front or back loops, chains, and slip stitches. If you are building a collection of projects with minimal assembly, browse our No Sew Amigurumi Patterns hub. You can also try our No Sew Octopus Crochet Pattern or No Sew Frog Crochet Pattern.
No Sew Turtle Crochet Pattern: Quick Reference
| Pattern detail | Information |
|---|---|
| Skill level | Advanced beginner |
| Terminology | US crochet terms |
| Construction | Two shell layers joined with crochet; head, flippers and tail formed during the join |
| Sewing | No assembly sewing |
| Main yarn | Worsted weight cotton or acrylic |
| Hook | 3.5 mm starting point |
| Expected finished length | About 9 to 11 cm, depending on yarn and tension |
| Worked | Continuous rounds plus one joining round |
Materials
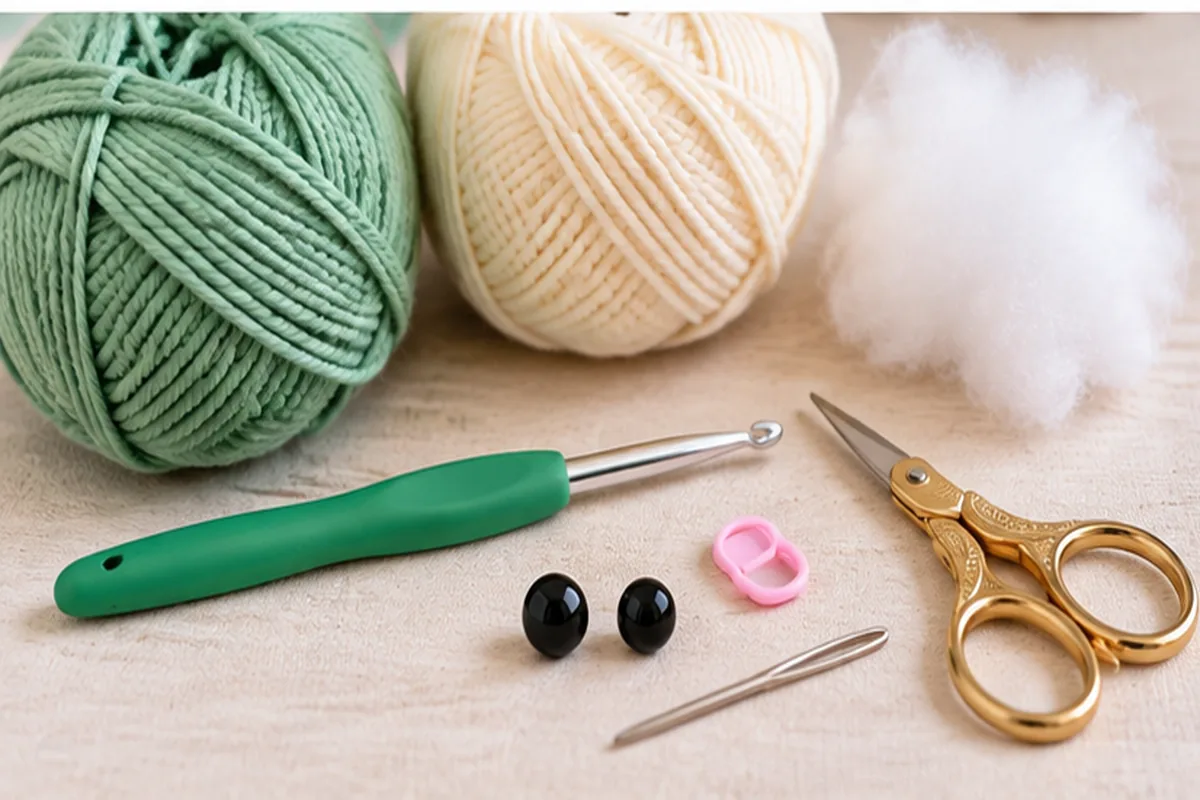
- Worsted weight yarn in green for the top shell
- Worsted weight yarn in cream, beige, or pale green for the underside and body details
- Small amount of black embroidery thread for the mouth
- Optional pink yarn for cheek stitches
- 3.5 mm crochet hook
- Polyester fiberfill
- Two 7 to 9 mm safety eyes, or black yarn for embroidered eyes
- Stitch marker
- Yarn needle for weaving in the final yarn end only
- Scissors
A smooth yarn is easiest for a first attempt because you can see the stitch structure around the shell edge. Plush or chenille yarn can make a softer turtle, but it hides loops and makes the joining round harder to read. If you want a plush version, make the standard yarn version first so you understand where each body feature is placed.
Crochet Abbreviations
| Abbreviation | Meaning |
|---|---|
| MR | Magic ring |
| ch | Chain |
| sc | Single crochet |
| inc | Increase, 2 sc in one stitch |
| dec | Invisible decrease |
| sl st | Slip stitch |
| FLO | Front loop only |
| BLO | Back loop only |
| st / sts | Stitch / stitches |
How This No Sew Turtle Is Constructed
The turtle is built from a green top shell and a cream underside. Instead of sewing those two circles together, you hold them with the wrong sides facing inward and crochet around both edges at the same time. During that joining round, chains are added at specific points to form the head, four flippers, and tail. The features are therefore anchored by crochet rather than needle-sewn seams.
This construction gives you two advantages. First, the shell has a clean, firm rim that helps it hold its shape. Second, the limbs are positioned by stitch count rather than by eye, so the finished turtle is easier to keep symmetrical. The most important part of the pattern is counting the 36 stitches around both shell pieces before you begin joining.
Pattern Notes Before You Start
- Work both shell pieces in continuous rounds.
- Move your stitch marker to the first stitch of every new round.
- Do not join the rounds unless the instructions specifically tell you to.
- Count 36 stitches around both shell pieces before the joining round.
- Stuff the turtle lightly. Overstuffing makes the shell look like a ball instead of a low dome.
- The head, flippers, and tail are made as chain extensions during the joining round.
- If you use safety eyes, install them in the head extension before the opening becomes too tight to access.
Step 1: Crochet the Top Shell
Use the green shell color. The first six rounds make a flat circle. The final round is worked in the back loops to create a subtle ridge along the outer edge.
| Round | Instructions | Stitches |
|---|---|---|
| 1 | 6 sc in MR | 6 |
| 2 | inc in each st around | 12 |
| 3 | [sc, inc] x 6 | 18 |
| 4 | [2 sc, inc] x 6 | 24 |
| 5 | [3 sc, inc] x 6 | 30 |
| 6 | [4 sc, inc] x 6 | 36 |
| 7 | BLO sc around | 36 |
Fasten off after Round 7. Leave a short tail that can be woven into the underside of the shell. The piece should lie mostly flat with a slight tendency to cup because of the back-loop round. Do not block it flat. That small amount of curve helps the top shell sit naturally over the stuffing.
Step 2: Crochet the Bottom Shell
Use the cream, beige, or pale body color. Make the underside with the same increase sequence, but stop after Round 6 so the edge remains easy to join.
| Round | Instructions | Stitches |
|---|---|---|
| 1 | 6 sc in MR | 6 |
| 2 | inc in each st around | 12 |
| 3 | [sc, inc] x 6 | 18 |
| 4 | [2 sc, inc] x 6 | 24 |
| 5 | [3 sc, inc] x 6 | 30 |
| 6 | [4 sc, inc] x 6 | 36 |
Do not fasten off. The working yarn from the underside will be used to join the two shell layers. Place the top shell over the underside with wrong sides facing each other. Match the stitch markers or the beginning of each round so the edges line up.
Step 3: Join the Shell and Build the Head
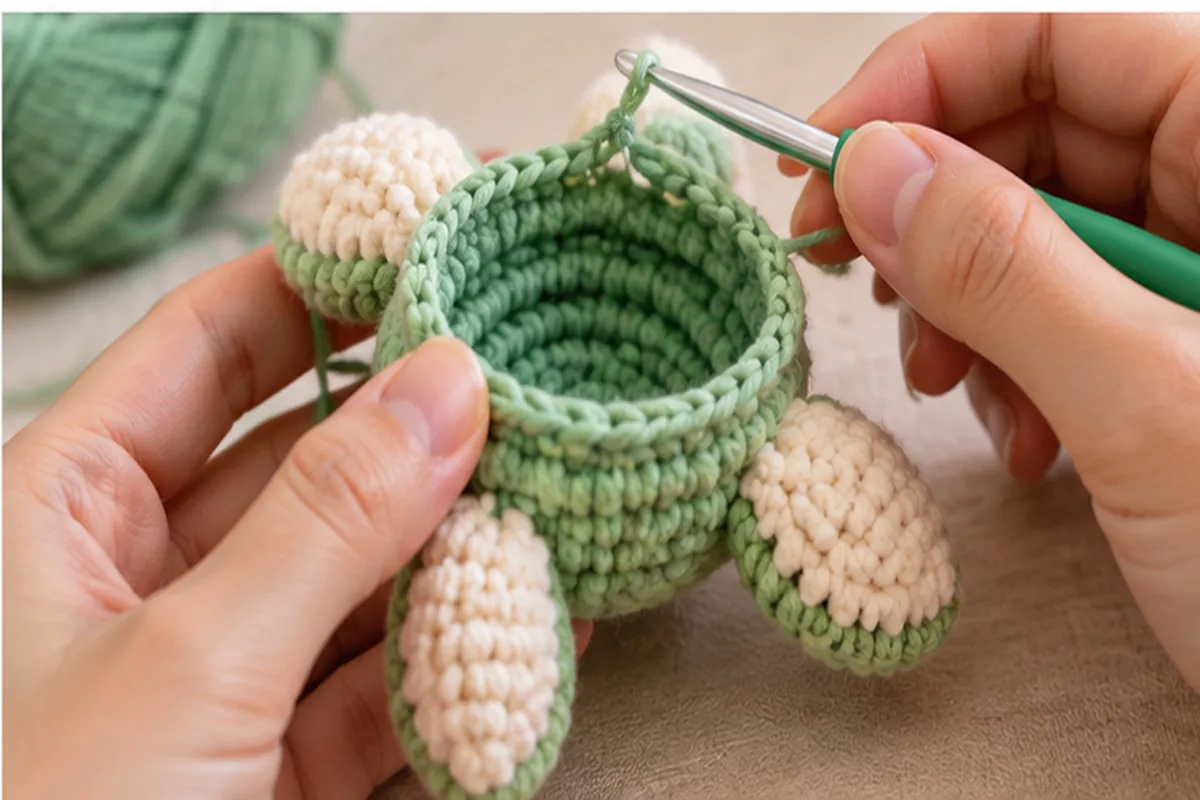
Insert the hook through one stitch of the underside and the corresponding stitch of the top shell. Work through both layers. This creates one firm joining stitch around the edge.
Work 5 sc through both layers. For the head, ch 8. Starting in the second chain from the hook, work 1 sc in each of the next 7 chains. Sl st back into the same shell stitch where the chain began, then work 1 sc through both shell layers in the next stitch. The chain strip folds naturally into a small rounded extension. You can gently curve it with your fingers so it projects forward.
If you are using safety eyes, place the eye posts through the front half of the head extension before the join becomes difficult to access. For a very small turtle or an item intended for a young child, embroidered eyes are the safer design choice because there are no detachable hard parts.
Step 4: Crochet the First Two Flippers
Continue around the shell. Work 4 sc through both layers after the head. To make a front flipper, ch 6. Starting in the second chain from the hook, work 1 sc in each of the next 5 chains. Sl st into the same shell stitch, then continue joining the shell.
Work 5 sc through both layers. Make the second flipper exactly the same way: ch 6, sc back along 5 chains, sl st into the shell edge. These front flippers should sit slightly behind the head rather than directly beside it. That spacing helps the silhouette read as a turtle instead of a five-pointed star.
Step 5: Add the Tail and Back Flippers
Continue joining with 5 sc. For the tail, ch 4. Starting in the second chain from the hook, sl st in the next 3 chains, then sl st back into the shell edge. The tail should be shorter and narrower than the flippers.
Work 5 sc. Make the first back flipper using the same ch-6 extension used for the front flippers. Work another 5 sc and make the final back flipper. Continue joining until only a gap of about 7 or 8 stitches remains open.
Step 6: Stuff and Finish the Join
Add small amounts of fiberfill through the remaining opening. Keep most of the stuffing in the center. The edge should stay relatively flat so the top and bottom shells meet cleanly. If stuffing pushes into the head or flippers, use the blunt end of your hook or a yarn needle to move it back toward the middle.
Once the shell has a soft low dome, finish crocheting through the remaining paired stitches. Slip stitch into the first joining stitch, fasten off, and weave the yarn end inside the shell. The edge should form a continuous crochet seam with no needle-sewn assembly.
Step 7: Add the Face
Use black embroidery thread to make a small curved smile between and slightly below the eyes. A simple two-stitch smile works best because the head extension is small. Optional pink cheek stitches can be added just outside the eyes. Keep embroidery tension light so the head does not pucker.
How the Finished Turtle Should Look
The finished turtle should have a gently domed green top shell, a flatter cream underside, a small forward-facing head, four evenly spaced flippers, and a short tail. With worsted yarn and a 3.5 mm hook, the expected length is around 9 to 11 cm from head to tail, but the exact result depends on yarn thickness, tension, and how firmly you stuff the shell.
The shell should not be hard or spherical. If your turtle looks very tall, remove some stuffing before closing the final stitches. A lower profile makes the flippers visible from above and gives the project a more recognizable turtle shape.
Yarn and Hook Size Guide
| Version | Yarn | Suggested hook | Expected result |
|---|---|---|---|
| Mini | Sport or DK | 2.5 to 3 mm | Small charm or ornament size |
| Standard | Worsted | 3.5 mm | Palm-size turtle |
| Plush | Chenille or super bulky | 5 to 6 mm | Larger, softer turtle |
These hook sizes are starting points rather than fixed rules. Two yarns labeled with the same weight can behave differently. Use a hook that creates a dense fabric without making it difficult to insert the hook under both loops during the joining round.
How to Keep the Turtle Symmetrical
Symmetry comes from counting, not from stretching the flippers after the project is finished. Before starting the joining round, mark the approximate head position, tail position, and four flipper locations with removable stitch markers. Compare the left and right sides before you crochet the extensions. If a feature is one stitch off, move it before continuing rather than trying to hide the difference later.
When the shell layers are held together, check that the beginning-of-round seams are stacked. If one circle is rotated relative to the other, the fabric may twist as you join. A little rotation is harmless, but large misalignment can make the shell edge ripple.
Common Problems and How to Fix Them
The shell edge is wavy
First confirm that both pieces have 36 stitches. If the counts are correct, check whether you accidentally placed two joining stitches into one edge stitch. Also avoid pulling the joining round much tighter than the shell rounds, because that can gather the edge.
The turtle looks too round
Remove some stuffing from the center. The project needs enough fiberfill to support the top shell, but it should remain a low dome. Overstuffing is the most common reason a small turtle starts to resemble a ball.
One flipper points backward
Chain extensions can twist as you work. Before making the next joining stitch, flatten the flipper and rotate the chain so the row of single crochet faces the direction you want. If the flipper is attached in the wrong shell position, unravel to that point and move the extension one stitch.
The two shell pieces do not match
Do not force them together. Count both pieces. If one has 35 or 37 stitches, locate the missing or extra increase and correct that shell before joining. Matching stitch counts are what keep the seam smooth.
The head is too flat
Gently curve the chain extension with your fingers and place a very small amount of stuffing near the base if there is room. Do not pack fiberfill into the whole head strip, because that can stretch the chain stitches and make the extension bulky.
Beginner Checklist Before Fastening Off
- Both shell pieces had 36 stitches before joining.
- The head and tail sit opposite each other.
- The two front flippers match each other.
- The two back flippers match each other.
- The shell is softly stuffed rather than rigid.
- The eyes are level.
- The joining seam has no unworked gaps.
- The final yarn end is hidden inside the shell.
Easy Turtle Variations
Sea turtle colors
Use deep green, teal, olive, or brown for the top shell and a sandy cream underside. A darker shell with a lighter body gives the silhouette more contrast.
Pastel turtle
Mint, lavender, pale blue, and soft pink work well for kawaii gift sets. Keep the underside neutral if you want the shell color to remain the main visual feature.
Mini keychain turtle
Use DK yarn and a smaller hook. If you add a keyring, attach it through several crochet stitches near the center of the shell rather than through one single loop. A keychain experiences repeated pulling that a shelf plush does not.
Embroidered shell details
Before joining the shell pieces, add simple lines or spots to the top shell with contrasting yarn. Keep embroidery flat so it does not interfere with the joining round.
No Sew Turtle vs Traditional Amigurumi Turtle
| Feature | This no sew turtle | Traditional turtle |
|---|---|---|
| Shell | Two layers crocheted together | Often sewn together |
| Head | Built during joining round | Usually separate piece |
| Flippers | Chain extensions | Often four separate pieces |
| Tail | Built into edge | Often sewn on |
| Assembly | No needle-sewn assembly | Multiple seams |
| Best for | Quick projects and repeat makes | More sculpted realistic shapes |
A traditional multi-piece turtle can create a rounder head, shaped flippers, and more realistic proportions. This version intentionally prioritizes a clean construction and minimal finishing. That makes it useful for beginners who understand basic rounds but want to avoid positioning and sewing six separate body pieces.
Safety Notes for Crochet Toys
For decorative use, safety eyes provide a clean finish. For babies or very young children, embroidered eyes are a better choice because they remove detachable plastic components. Secure every yarn end inside the project and inspect the joining seam before giving the turtle as a toy. Handmade construction alone does not certify an item for a particular age group.
What to Make Next
If you liked building the turtle without needle-sewn assembly, try the No Sew Frog Crochet Pattern for a one-piece bobble-limb construction or the No Sew Octopus Crochet Pattern for spiral tentacles made directly from the body. Our No Sew Amigurumi Patterns page collects more project ideas as the series grows.