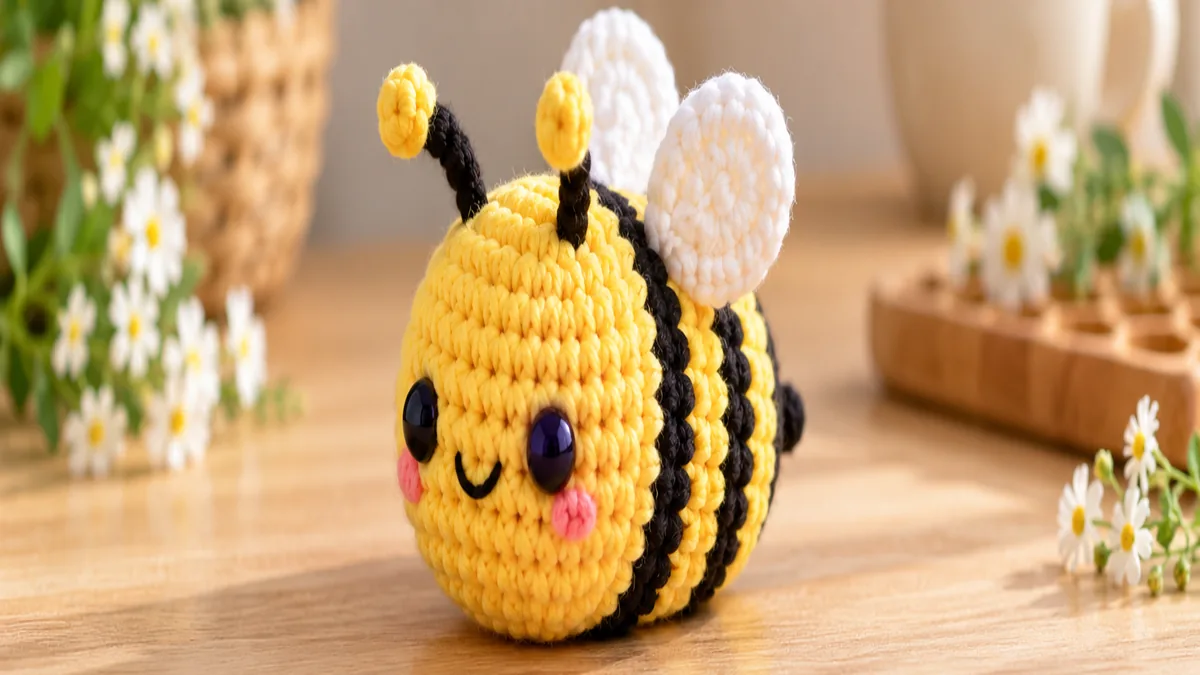
This no sew bee crochet pattern makes a round striped amigurumi bee with its body worked in one continuous piece. The wings are crocheted directly into the body round, and the antennae are added with surface crochet, so there are no separate wings, legs, or antenna pieces to sew on. The result is a quick, cheerful project that is especially useful for beginners who enjoy amigurumi but want to avoid complicated assembly.
The pattern is written in US crochet terms and uses simple color changes between yellow and black. If you are new to no-sew construction, the bee is a good next project after our No Sew Octopus Crochet Pattern or No Sew Frog Crochet Pattern. You can also browse the growing No Sew Amigurumi Patterns collection for more ideas.
No Sew Bee Crochet Pattern: Quick Reference
| Pattern detail | Information |
|---|---|
| Skill level | Beginner to advanced beginner |
| Terminology | US crochet terms |
| Construction | One continuous body with integrated wing loops |
| Sewing | No assembly sewing |
| Yarn | Worsted weight yellow, black, and white |
| Hook | 3.5 mm starting point |
| Expected finished length | About 8 to 10 cm depending on yarn and tension |
| Worked | Continuous rounds from face to back |
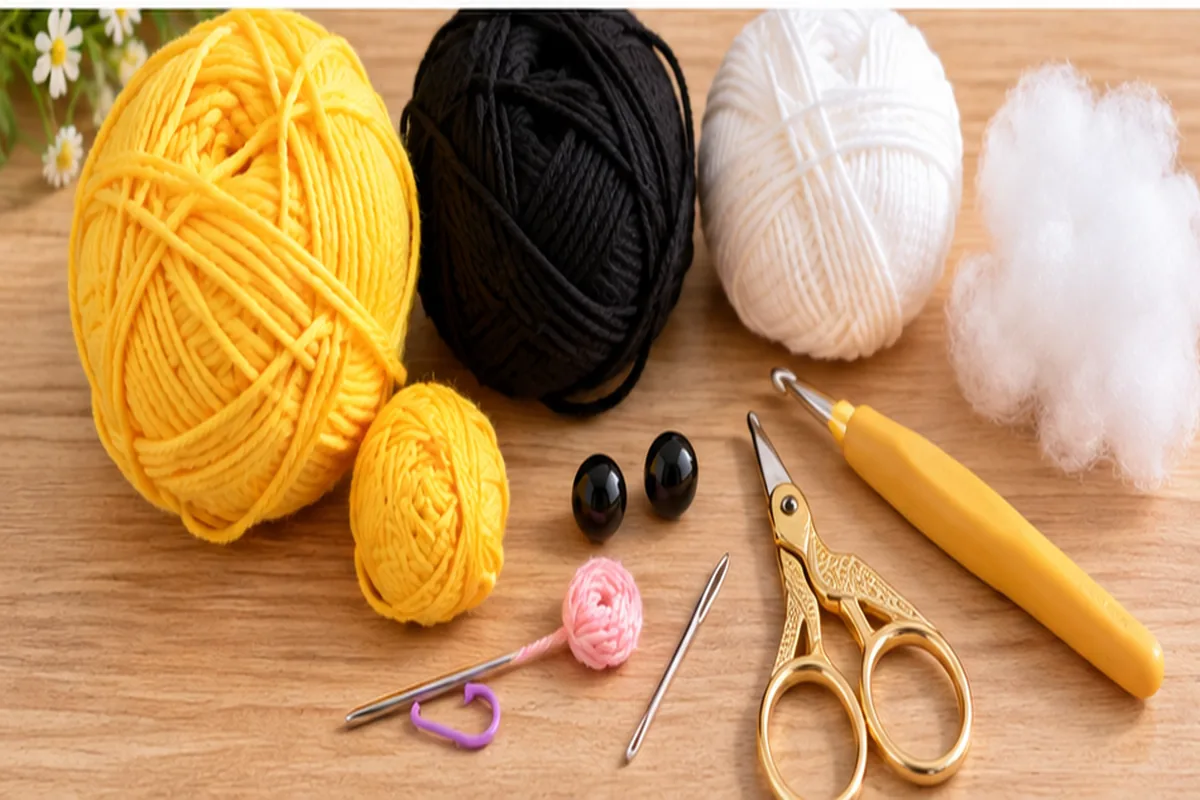
Materials
- Worsted weight yellow yarn
- Worsted weight black yarn
- Small amount of white yarn for wing loops
- Small amount of black embroidery thread for the mouth
- Optional pink yarn for cheeks
- 3.5 mm crochet hook
- Polyester fiberfill
- Two 8 to 10 mm safety eyes, or black yarn for embroidered eyes
- Stitch marker
- Yarn needle for weaving in ends
- Scissors
For your first version, choose yarns with similar thickness and texture. If the black yarn is significantly thicker than the yellow yarn, the stripe rounds may bulge outward. Smooth acrylic or cotton is easy to see and count. Chenille creates a larger plush bee, but color changes and wing placement are harder to read in fuzzy yarn.
Crochet Abbreviations
| Abbreviation | Meaning |
|---|---|
| MR | Magic ring |
| ch | Chain |
| sc | Single crochet |
| inc | Increase, 2 sc in one stitch |
| dec | Invisible decrease |
| sl st | Slip stitch |
| st / sts | Stitch / stitches |
How the No Sew Bee Is Built
The bee begins at the face and grows toward the back in continuous rounds. Yellow and black stripe rounds are worked directly into the same body. The white wings are made as chain loops while you are already crocheting one of the body rounds, which means there are no loose wing pieces to pin or sew later.
The body is widest at 24 stitches. Keeping that stitch count steady through the middle gives the bee a soft oval shape. The decreases are saved for the final rounds so you have enough room to install the eyes and add stuffing before the opening becomes small.
Pattern Notes Before You Start
- Work in continuous rounds unless stated otherwise.
- Move your stitch marker to the first stitch of every round.
- The color change happens on the final pull-through of the stitch before the new color begins.
- Carry the unused color loosely inside the body when practical, or cut and secure it if you prefer a cleaner interior.
- The wings are chain loops, not separate crochet pieces.
- Stuff in small amounts so the stripe rounds stay smooth.
- Install safety eyes while the front half of the body is still easy to access.
How to Make a Clean Color Change
To change from yellow to black, begin the final single crochet of the yellow round normally. Insert the hook, yarn over with yellow, and pull up a loop. Before the last yarn over, drop the yellow yarn and use black for the final pull-through. The black loop is now on your hook and the next stitch begins in black.
The join will still create a small step because amigurumi is worked in a spiral. That is normal. You can place the color-change line on the underside of the bee so it is less noticeable from the front. Do not add extra stitches to hide the step, because changing the stitch count will distort the oval body.
Step 1: Crochet the Face and Front of the Body
Start with yellow yarn. The first four rounds build the front dome of the bee.
| Round | Instructions | Stitches |
|---|---|---|
| 1 | 6 sc in MR | 6 |
| 2 | inc in each st around | 12 |
| 3 | [sc, inc] x 6 | 18 |
| 4 | [2 sc, inc] x 6 | 24 |
| 5 | sc around in yellow | 24 |
| 6 | sc around in yellow | 24 |
After Round 6, the piece should look like a shallow yellow cup. If the edge ripples outward, check that Round 4 ended with exactly 24 stitches. If the fabric is very open, switch to a slightly smaller hook before continuing.
Step 2: Add the Eyes and Face Position
Choose the front of the bee and place the eyes between Rounds 4 and 5, approximately 5 to 6 stitches apart. Insert both eye posts but wait before locking the washers. Look at the bee from directly in front and from above to make sure they are level.
If the bee is intended for a baby or very young child, use embroidered eyes instead of plastic safety eyes. Embroidered features remove detachable hard components from the design. You can embroider the mouth now or wait until the body is complete.
Step 3: Crochet the First Black Stripe
Change to black on the final pull-through of Round 6.
| Round | Color | Instructions | Stitches |
|---|---|---|---|
| 7 | Black | sc around | 24 |
| 8 | Black | sc around | 24 |
Keep the black rounds the same tension as the yellow rounds. Pulling the darker yarn much tighter can pinch the middle of the bee. If you carry yellow inside, leave enough slack that the unused strand does not shorten the circumference.
Step 4: Crochet the Yellow Middle and Integrated Wings
Change back to yellow. Work Round 9 in yellow with 24 sc. On Round 10, the two white wing loops are added directly into the body.
Round 10: work 5 sc in yellow. Change to white only for the wing loop, ch 8, then sl st back into the same body stitch where the chain began. Change back to yellow. Work 12 sc in yellow. Make a second white wing loop in the same way: ch 8 and sl st into that body stitch. Finish with 7 sc in yellow. (24 body stitches)
The chains do not replace body stitches. Think of each wing as an extra loop rising from the surface while the 24-stitch body round continues underneath it. This is why the stitch count remains 24.
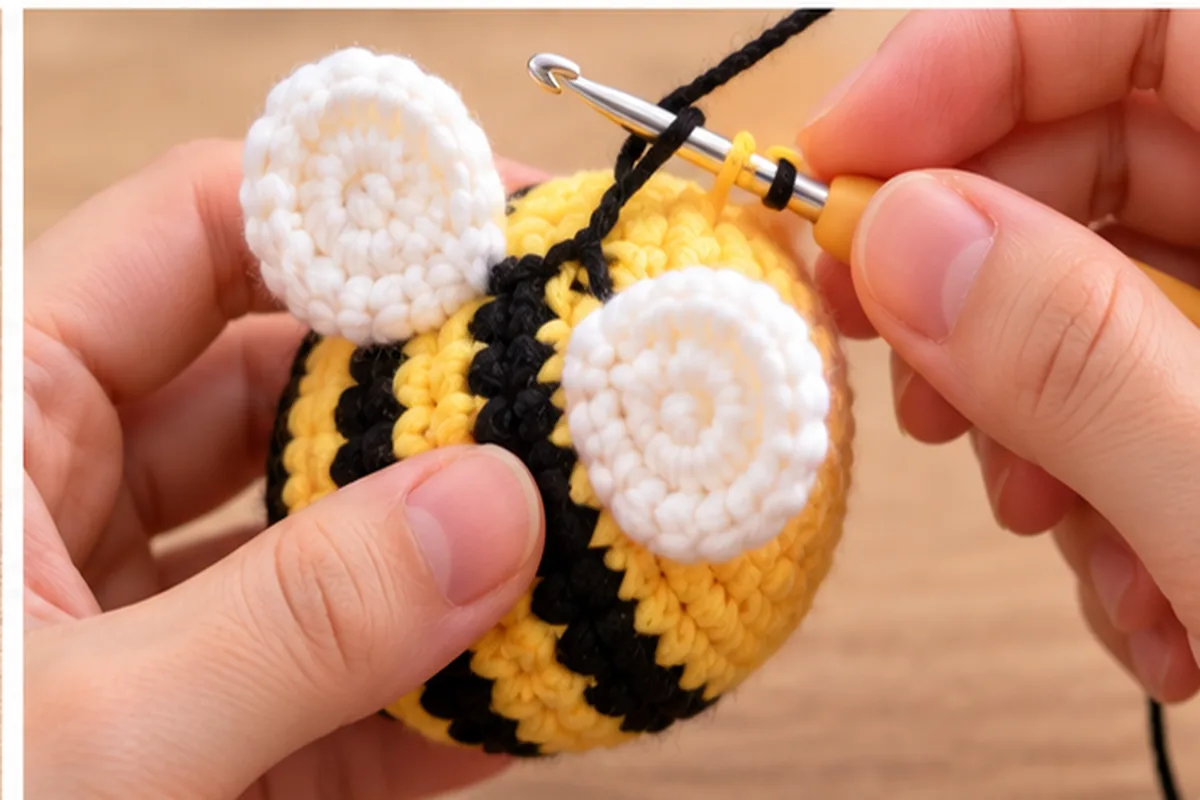
After the round, pull each wing loop gently outward. The loops should sit on opposite upper sides of the bee. If one wing lands too close to the underside seam, unravel only Round 10 and shift the placement by one or two stitches while keeping the total body count at 24.
Step 5: Crochet the Second Black Stripe
Change to black after the wing round.
| Round | Color | Instructions | Stitches |
|---|---|---|---|
| 11 | Black | sc around | 24 |
| 12 | Black | sc around | 24 |
Before the body starts decreasing, check that the wings sit above the black stripe rather than folding toward the belly. You can rotate the chain loops with your fingers. Because they are anchored in one body stitch, small adjustments are easy before stuffing becomes firm.
Step 6: Shape the Back of the Bee
Change back to yellow. The final rounds taper the back of the body.
| Round | Instructions | Stitches |
|---|---|---|
| 13 | [2 sc, dec] x 6 | 18 |
| 14 | [sc, dec] x 6 | 12 |
| 15 | dec x 6 | 6 |
Begin stuffing after Round 13. Fill the face first and use small pieces of fiberfill around the eyes so the front stays smooth. Add more stuffing after Round 14. The bee should feel springy and rounded, not hard. Overstuffing can stretch the black stripe stitches and make the color changes look uneven.
After Round 15, cut the yarn leaving a tail. Thread the tail through the front loops of the six remaining stitches and pull closed like a drawstring. Hide the yarn end inside the body.
Step 7: Add No Sew Antennae with Surface Crochet
Use black yarn and your crochet hook. Insert the hook through a stitch near the top front of the bee and pull up a black loop from the yarn held behind the fabric. Ch 4, then sl st back down the chain to create a short antenna. Secure the working loop through the body stitch and hide the yarn end inside.
Repeat on the other side, keeping the two antennae evenly spaced. For softer tips, you can finish each antenna with one extra chain before slipping back down. This method uses crochet rather than sewing a separate antenna piece to the body.
Step 8: Embroider the Mouth and Optional Cheeks
Use black thread for a small curved smile centered one round below the eyes. Keep the smile short so it does not disappear into the first black stripe. Add one or two pink stitches on each side for cheeks if you want a kawaii expression.
How the Finished Bee Should Look
The finished bee should have a rounded yellow face, two black body stripes, a tapered yellow back, two white chain-loop wings, and two short black antennae. With worsted yarn and a 3.5 mm hook, the expected finished length is around 8 to 10 cm, depending on your tension and the exact yarn.
The body should remain oval rather than perfectly spherical. If your bee is very round, you may have stuffed too firmly or shortened the straight middle section. If it looks long and narrow, check whether your single crochet tension loosened during the stripe rounds.
Yarn and Hook Size Guide
| Version | Yarn | Suggested hook | Expected result |
|---|---|---|---|
| Mini | Sport or DK | 2.5 to 3 mm | Small charm-size bee |
| Standard | Worsted | 3.5 mm | Palm-size bee |
| Plush | Chenille or super bulky | 5 to 6 mm | Larger soft bee |
When moving to thicker yarn, keep the stitch counts the same and change the hook size to suit the yarn. The wing chains may need to be slightly longer in very bulky yarn if they look too small in proportion to the body.
How to Make the Stripes Look Cleaner
Place the spiral color-change step on the underside. Use the new color for the final pull-through of the previous stitch. Keep both yarns at similar tension, and avoid tying large knots inside the body. Knots can create hard bumps that show through a tightly stuffed amigurumi.
If you carry the unused color, do not pull it across the center like a tight chord. Let the strand follow the inside curve of the body. The goal is to prevent the inactive yarn from shortening the circumference of the round.
Common Problems and How to Fix Them
My wing loops are different sizes
Count eight chains for each wing and keep the chain tension similar. If one loop still looks larger, check whether you accidentally added a ninth chain or pulled the slip stitch anchor very loosely.
The stripe join is obvious
A small step is normal in continuous spiral crochet. Position it on the underside rather than trying to hide it with extra stitches. Adding or skipping stitches to force a straight stripe can change the body shape.
The bee is lopsided
Check the stitch count at the end of every round. A missing decrease at the back can pull the closing point to one side. Also make sure the stuffing is distributed evenly around the eyes and stripe rounds.
The wings point downward
Rotate the chain loops upward before the next round tightens around them. If the anchor stitch is too low on the body, unravel the wing round and move the wing one stitch higher around the circumference.
Stuffing shows through the black yarn
Dark yarn can make gaps easier to notice. Use a slightly smaller hook or reduce stuffing pressure. Do not pull only the black rounds extremely tight, because that creates a pinched stripe.
Beginner Checklist Before Fastening Off
- The eyes are level and centered on the yellow face.
- Both black stripe sections contain 24 stitches per round.
- The two wings use the same number of chains.
- The wings sit on opposite upper sides of the body.
- The body is evenly stuffed.
- The final opening is fully closed.
- The antennae are similar in length.
- All loose yarn ends are hidden inside the bee.
Easy Bee Variations
Pastel bee
Replace bright yellow with pale lemon, peach, mint, or lavender and keep the dark stripe color consistent. White or cream wings work well with pastel bodies.
Sleepy bee
Embroider two curved eyelids instead of using safety eyes. This changes the expression and removes plastic eye components from the project.
Tiny keychain bee
Use DK yarn and a smaller hook. Attach the keyring through several reinforced stitches near the top-back of the bee. Avoid attaching hardware through a single surface chain or antenna.
Longer wings
Increase each wing loop from ch 8 to ch 10. Keep both loops the same length and check that the larger wings do not cover the black stripe completely.
No Sew Bee vs Traditional Crochet Bee
| Feature | This no sew bee | Traditional bee |
|---|---|---|
| Body | One continuous piece | Usually one piece |
| Wings | Integrated chain loops | Often separate pieces |
| Antennae | Surface crochet | Often sewn on |
| Assembly | No separate pieces to stitch on | Wing and antenna placement required |
| Best for | Quick beginner projects | More sculpted wing shapes |
A traditional bee pattern can create larger shaped wings and more detailed legs. This no-sew version intentionally simplifies those features so the project stays quick, repeatable, and easy to finish. That tradeoff is useful for gift batches, market preparation, beginner practice, or anyone who dislikes sewing small crochet pieces.
Safety Notes
Use embroidered eyes for babies and very young children. Make sure the final closure is tight and all carried yarn strands are secured inside the body. If the bee is used as a keychain or bag charm, inspect the attachment point regularly because decorative items experience more pulling and abrasion than shelf plushies.
What to Make Next
For another small no-sew animal, try the No Sew Frog Crochet Pattern. If you want a project with a completely different texture, the No Sew Octopus Crochet Pattern uses spiral tentacles instead of color changes. You can find the full growing series in our No Sew Amigurumi Patterns guide.