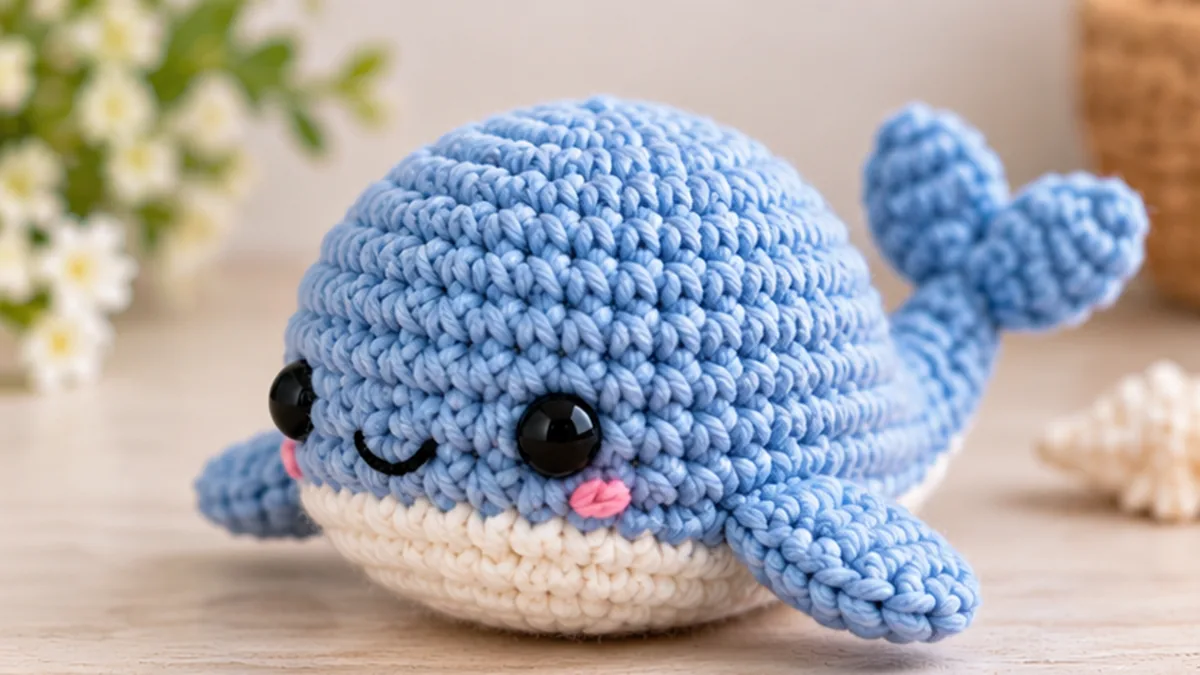
This no sew whale crochet pattern creates a small rounded amigurumi whale with integrated side fins and a tail formed directly from the final body opening. The whale is worked from the face toward the tail in continuous rounds, so there are no separate fins or tail pieces to position and sew on later. An optional pale belly can be added with simple surface embroidery or duplicate stitches after the body is complete.
The pattern uses US crochet terms and is designed for beginners who already know a magic ring, single crochet, increase, decrease, chain, slip stitch, and basic color changes if they want the optional belly. If you enjoy minimal-assembly projects, explore our No Sew Amigurumi Patterns hub, plus the No Sew Octopus Crochet Pattern and No Sew Frog Crochet Pattern.
No Sew Whale Crochet Pattern: Quick Reference
| Pattern detail | Information |
|---|---|
| Skill level | Beginner to advanced beginner |
| Terminology | US crochet terms |
| Construction | One continuous body with integrated fins and tail |
| Sewing | No assembly sewing |
| Yarn | Worsted weight cotton or acrylic |
| Hook | 3.5 mm starting point |
| Expected finished length | About 10 to 12 cm depending on yarn and tension |
| Worked | Continuous rounds from nose to tail |
Materials
- Worsted weight blue, gray, or another main-color yarn
- Small amount of cream or white yarn for the optional belly
- Small amount of black embroidery thread for the mouth
- Optional pink yarn for cheek stitches
- 3.5 mm crochet hook
- Polyester fiberfill
- Two 7 to 9 mm safety eyes, or black yarn for embroidered eyes
- Stitch marker
- Yarn needle for weaving ends and optional belly embroidery
- Scissors
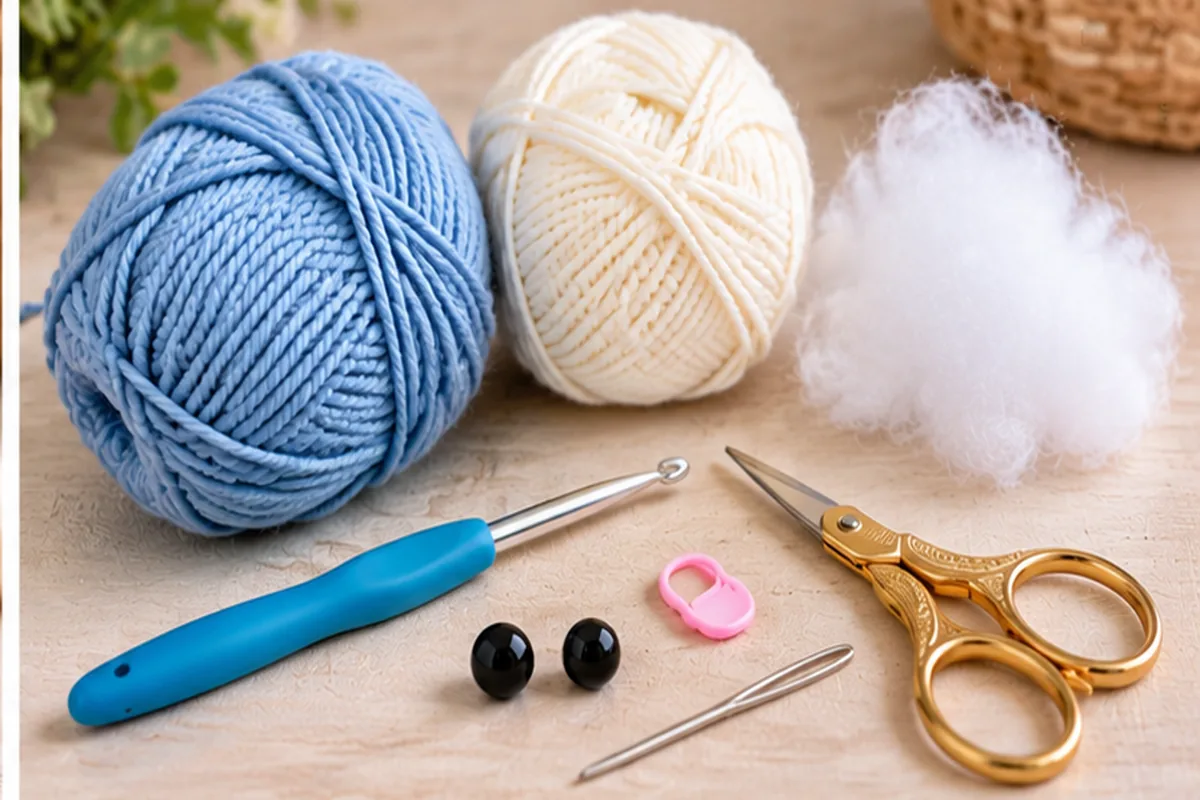
A smooth cotton or acrylic yarn gives the cleanest stitch definition for the first version. If you prefer a soft plush whale, chenille can be used with a larger hook. Keep in mind that fuzzy yarn makes the integrated fin stitches more difficult to identify, so it is easier after you already understand the construction.
Crochet Abbreviations
| Abbreviation | Meaning |
|---|---|
| MR | Magic ring |
| ch | Chain |
| sc | Single crochet |
| hdc | Half double crochet |
| dc | Double crochet |
| inc | Increase, 2 sc in one stitch |
| dec | Invisible decrease |
| sl st | Slip stitch |
| st / sts | Stitch / stitches |
How This No Sew Whale Is Constructed
The whale begins at the rounded nose. Increase rounds create a broad front section, then several straight rounds form the body. Each side fin is made as a short chain extension directly from a body stitch, so the fin becomes part of the same round. The back of the body narrows gradually before the opening is folded flat and crocheted closed with two tail flukes built into that final edge.
This approach avoids one of the hardest parts of traditional whale amigurumi: trying to pin two small fins at exactly the same height and angle. Here, the fin placement is controlled by stitch count. The tail is also symmetrical because both flukes are worked from the same flattened opening.
Pattern Notes Before You Start
- Work in continuous rounds until the tail-closing step.
- Move the stitch marker to the first stitch of each round.
- Count every round before beginning the next one.
- The fins are chain extensions and do not change the body stitch count.
- Stuff gradually, with most of the fiberfill in the head and middle body.
- Do not overstuff the tail end or it will be difficult to fold flat.
- The optional cream belly is decorative and does not require a separate crochet piece.
Step 1: Crochet the Rounded Nose
Use the main whale color. The first five rounds build the rounded front and establish the widest point of the body.
| Round | Instructions | Stitches |
|---|---|---|
| 1 | 6 sc in MR | 6 |
| 2 | inc in each st around | 12 |
| 3 | [sc, inc] x 6 | 18 |
| 4 | [2 sc, inc] x 6 | 24 |
| 5 | [3 sc, inc] x 6 | 30 |
The piece should look like a shallow cup after Round 5. If the fabric starts ruffling, check the stitch count. A whale body needs a smooth dome, so accidental extra increases are easier to see now than after stuffing.
Step 2: Build the Front Body and Place the Eyes
| Round | Instructions | Stitches |
|---|---|---|
| 6 | sc around | 30 |
| 7 | sc around | 30 |
| 8 | sc around | 30 |
Place the safety eyes between Rounds 6 and 7, approximately 6 to 7 stitches apart. The exact visual spacing depends on yarn thickness, so insert the posts first and look at the face from the front before attaching the washers. The eyes should sit on the forward-facing half of the body, not on the upper surface.
For a whale intended for babies or very young children, embroider the eyes instead of using detachable plastic components. A small curved embroidered eye also creates a sleepy whale variation.
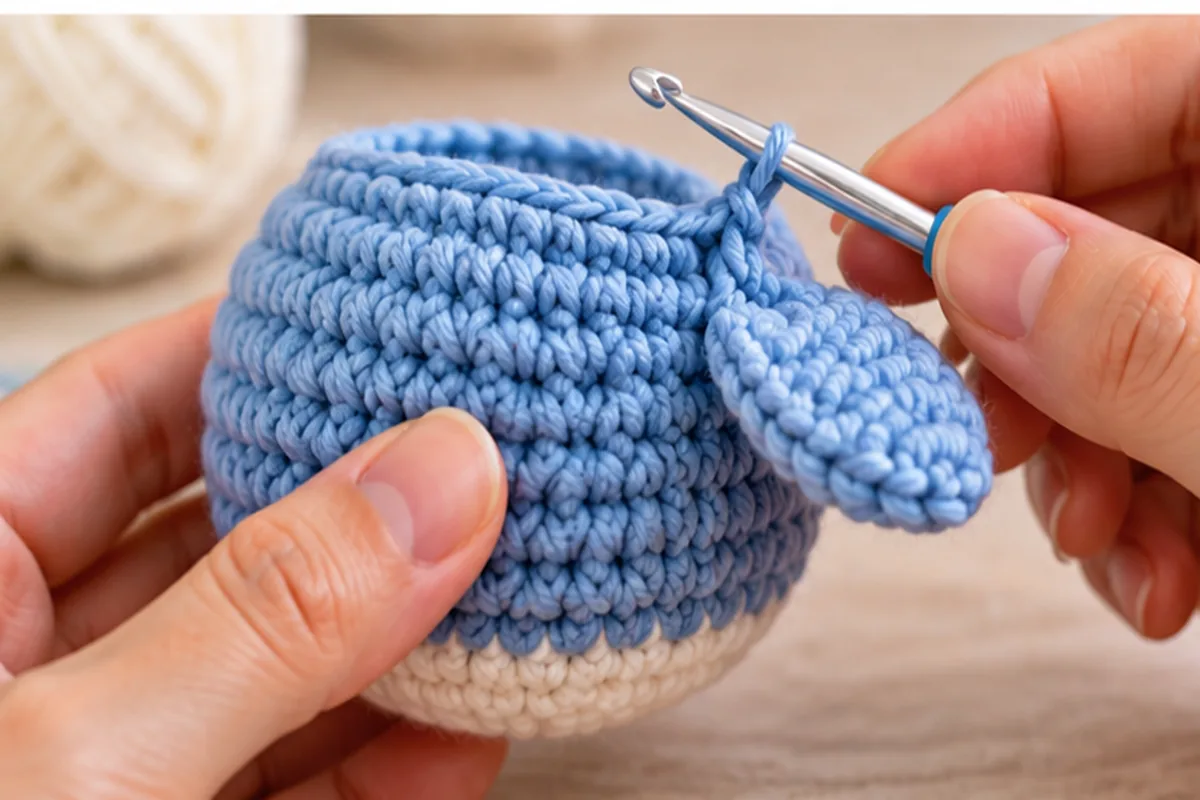
Step 3: Crochet the Side Fins Into the Body
Round 9 includes both fins while keeping the 30 body stitches intact.
Round 9: work 7 sc. For the first fin, ch 5. Starting in the second chain from the hook, work sl st, sc, hdc, dc back toward the body. Sl st into the same body stitch where the chain began. Continue with 14 sc around the body. Make the second fin in the same way: ch 5, then sl st, sc, hdc, dc back along the chain, and sl st into the same body stitch. Finish with 9 sc. (30 body stitches)
Each fin is shaped by increasing stitch height from slip stitch to double crochet as you return toward the body. This creates a slightly wider base and a narrower tip. The fins should point outward and slightly backward.
Step 4: Extend the Body Behind the Fins
Work one straight round after the fins so they sit naturally on the sides instead of directly beside the decrease section.
| Round | Instructions | Stitches |
|---|---|---|
| 10 | sc around | 30 |
Before beginning the decreases, check both fins from above. If one fin twists downward, rotate the chain strip outward with your fingers. A small adjustment now is easier than trying to reshape the fin after the tail is closed.
Step 5: Shape the Back of the Whale
| Round | Instructions | Stitches |
|---|---|---|
| 11 | [3 sc, dec] x 6 | 24 |
| 12 | [2 sc, dec] x 6 | 18 |
| 13 | [sc, dec] x 6 | 12 |
| 14 | [sc, dec] x 4 | 8 |
Begin stuffing after Round 11. Fill the rounded front first, then add smaller pieces through the middle. After Round 13, add the final stuffing but leave the last centimeter near the opening fairly soft. You need to flatten that opening for the tail construction.
Step 6: Fold the Tail Opening Flat
After Round 14, you have 8 stitches. Fold the opening flat so 4 front stitches line up with 4 back stitches. The stitch marker should sit near one edge rather than in the middle. If the body feels too full to flatten, remove a small amount of stuffing from the tail area.
You will now work through both layers at the same time. This closes the body without a sewn seam and creates a firm base for the two tail flukes.
Step 7: Crochet the Two Tail Flukes
Slip stitch through the first pair of folded stitches. At the second pair, work the first tail fluke: ch 6. Starting in the second chain from the hook, work sl st, sc, hdc, dc, dc back toward the body. Sl st through the same folded pair to anchor the fluke.
Slip stitch through the third folded pair. Make the second fluke exactly the same way: ch 6, then sl st, sc, hdc, dc, dc back along the chain, and sl st through the same folded pair. Slip stitch through the fourth and final folded pair. Fasten off and hide the yarn end inside the body.
The two flukes should angle away from each other. If they overlap, gently rotate one at its anchor point. Do not pull the anchor stitches extremely tight, because the tail base should remain flexible enough for the flukes to spread.
Step 8: Add the Mouth and Optional Cream Belly
Use black embroidery thread for a small curved smile between the eyes. Keep the stitches short and shallow so the mouth does not pull the stuffing forward.
For the optional pale belly shown in some whale styles, use cream yarn to make flat duplicate stitches across the lower front rounds. Follow existing crochet stitches rather than covering the whole underside with a separate patch. This keeps the project no-sew because you are decorating the surface instead of attaching a separate crocheted piece.
How the Finished Whale Should Look
The finished whale should have a rounded face, oval body, two side fins placed at the same height, a narrowing tail base, and two symmetrical tail flukes. With worsted yarn and a 3.5 mm hook, the expected length is around 10 to 12 cm from nose to tail, but your exact size depends on yarn thickness, hook choice, tension, and stuffing.
The front should be fuller than the tail. If the whale looks like a round ball with a tail attached, reduce the amount of stuffing near the back. If it looks too narrow, check that the straight 30-stitch rounds were completed before the decreases began.
Whale Color and Size Ideas
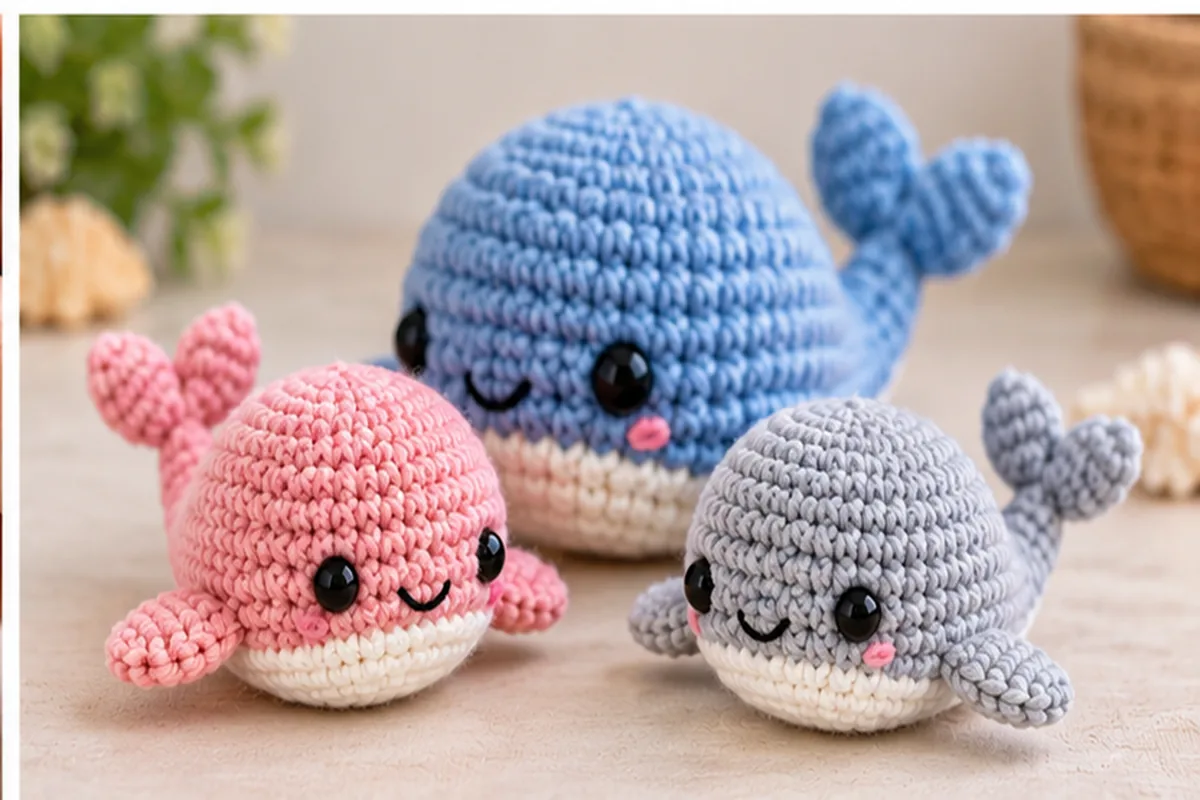
| Version | Main color | Belly option | Look |
|---|---|---|---|
| Ocean blue | Soft blue | Cream | Classic friendly whale |
| Pink kawaii | Blush pink | White | Soft gift-style design |
| Gray whale | Light gray | Pale gray or cream | More neutral palette |
| Mini charm | Any color | Optional | Use thinner yarn and smaller hook |
Yarn and Hook Size Guide
| Version | Yarn | Suggested hook | Expected result |
|---|---|---|---|
| Mini | Sport or DK | 2.5 to 3 mm | Small charm-size whale |
| Standard | Worsted | 3.5 mm | Palm-size whale |
| Plush | Chenille or super bulky | 5 to 6 mm | Larger soft plush whale |
Use the table as a starting point, not a strict gauge rule. Amigurumi fabric should be dense enough to hide stuffing while still allowing you to work decreases without forcing the hook through the stitches.
How to Keep Both Fins Even
The body count is 30 stitches when the fins are added. That makes the easiest symmetry check numerical. Before working Round 9, place removable markers where you expect the fins to begin. Count the stitches between them from both directions. If the spacing looks uneven, move the markers before crocheting the actual fin chains.
Use the same four return stitches for each fin: slip stitch, single crochet, half double crochet, double crochet. If one fin becomes longer, check whether you accidentally worked into the starting chain or added an extra chain at the tip.
Common Problems and How to Fix Them
One fin is higher than the other
Check the number of body stitches before each fin anchor. If the body count is correct but the visual placement is still off, unravel Round 9 and shift both fin positions together rather than adding or removing body stitches.
The whale tail will not lie flat
Remove some stuffing from the last few rounds. The 8-stitch opening must flatten into four stitch pairs. If the tail area is packed firmly, the two layers fight against each other and the flukes twist.
The tail flukes overlap
Rotate the anchor loops slightly outward before tightening the last slip stitch. Make sure both flukes use six chains. If one fluke has an extra chain, it may cross over the other.
The front is not rounded
Check the increase sequence in Rounds 1 to 5 and distribute stuffing evenly around the eyes. A missed increase can create a flat side, while one large clump of stuffing can push the face off center.
Stuffing shows through the stitches
Use a slightly smaller hook or reduce the amount of fiberfill. The solution is not to pull every stitch excessively tight, because that makes decreases and fin rounds harder to work.
Beginner Checklist Before Fastening Off
- The eyes are level on the front of the whale.
- The body has 30 stitches through the straight middle section.
- Both fins use the same chain and return-stitch sequence.
- The back of the body narrows evenly.
- The final 8-stitch opening can fold flat.
- The two tail flukes match in length.
- The tail seam is completely closed.
- All yarn ends are hidden inside the body.
Easy Whale Variations
Sleepy whale
Use curved embroidered eyelids instead of safety eyes. Keep the mouth very small or omit it for a calm expression.
Two-tone belly
Add cream duplicate stitches across the lower front after the whale is closed. Work loosely so the decorative stitches sit on the surface rather than pulling the body inward.
Mini keychain whale
Use DK yarn and a smaller hook. Attach hardware through several reinforced stitches near the top-back of the body, never through a fin or tail fluke.
Plush whale
Use super bulky chenille and a larger hook. Keep the same stitch counts, but expect the finished whale to be much larger. Because chenille can shed or hide stitches, count carefully around the fin round.
No Sew Whale vs Traditional Amigurumi Whale
| Feature | This no sew whale | Traditional whale |
|---|---|---|
| Body | One continuous piece | Usually one body piece |
| Fins | Built into body round | Often separate pieces |
| Tail | Built from final opening | Often crocheted separately |
| Belly | Optional surface detail | May use separate patch |
| Assembly | No fin or tail sewing | Several placement seams |
| Best for | Quick beginner projects | More sculpted realistic shapes |
A traditional multi-piece whale can create wider fins, more dramatic tail shapes, and a separate belly patch. This version focuses on a smooth minimal-assembly construction. The simplified features make it easier to repeat and remove the need to pin small parts symmetrically before sewing.
Safety Notes
For babies and very young children, use embroidered eyes instead of plastic safety eyes. Secure the final tail seam and every yarn end before use. If you convert the whale into a keychain or bag charm, inspect the hardware attachment regularly because repeated pulling can wear the crochet fabric.
What to Make Next
If you enjoy sea-creature amigurumi, the No Sew Octopus Crochet Pattern is the natural next project. For a different construction method, try the No Sew Frog Crochet Pattern. Our No Sew Amigurumi Patterns guide collects the growing series in one place.